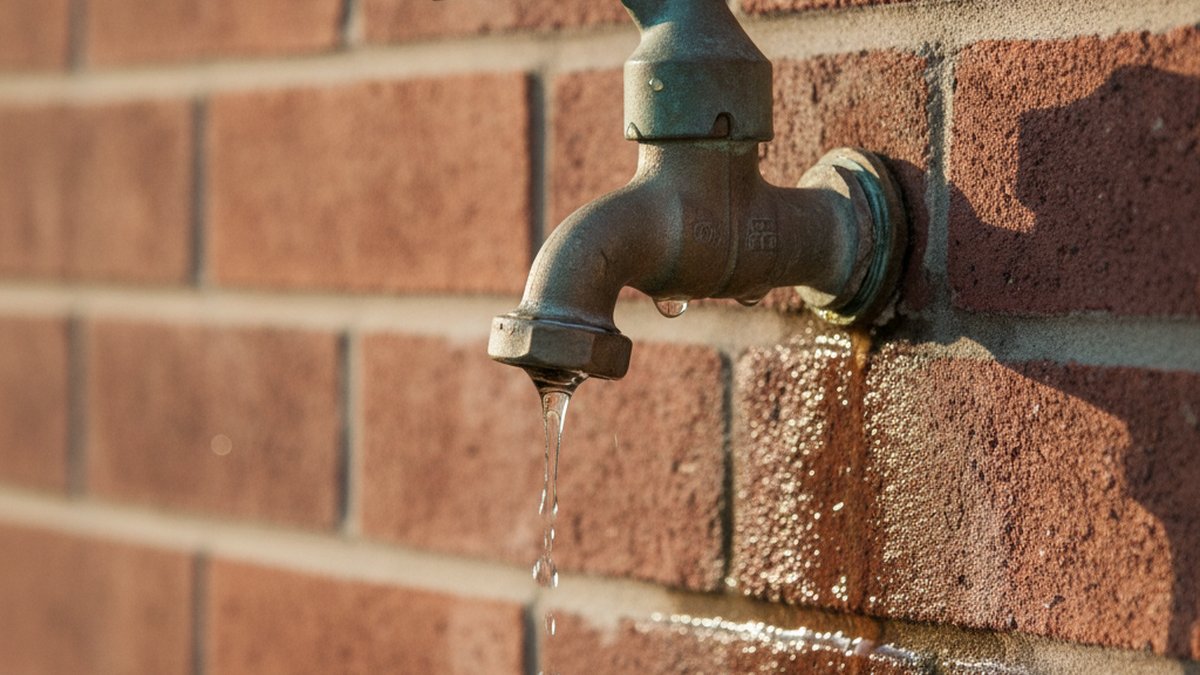
If you want to fix a leaking outdoor faucet handle — that annoying dribble that appears at the base of the handle every time you turn on the hose — you’re dealing with one of the easiest plumbing repairs there is. Water sneaking out around the handle stem (not the spout) is a “packing” problem, and 90% of the time you fix it with a wrench you already own and a part that costs less than a coffee. In this guide I’ll walk you through diagnosing exactly where the leak is coming from, the two most common fixes, when a frost-free hydrant needs a different approach, and how to tell when it’s finally time to swap the whole faucet.
Where is the leak actually coming from — the handle or the spout?
Before you touch a wrench, figure out where the water is escaping, because it changes the fix entirely. Turn the faucet on halfway and watch closely for 20 seconds.
- Water seeps out around the handle/stem when the faucet is ON → this is a packing leak. It’s the classic “leaking outdoor faucet handle” problem and the focus of this article. The seal that hugs the moving stem has loosened or worn.
- Water drips from the spout when the faucet is fully OFF → that’s a seat washer problem at the bottom of the stem, not a handle problem. Different washer, same teardown.
- Water leaks from the wall or floods behind the siding in winter → on a frost-free/frost-proof hydrant, that usually means a cracked internal tube from freeze damage, which is a bigger job.
Most people who search for this fix are seeing that first symptom: turn the tap on, and a bead of water creeps up the stem and drips off the handle. Good news — that’s the friendliest one to fix.
How do I fix a leaking outdoor faucet handle step by step?
Start by tightening the packing nut a quarter-turn; if the drip persists, replace the packing washer or O-ring behind it. Here’s the full sequence for a standard compression-style hose bib (the most common outdoor faucet in North America).
- Shut off the water supply. If your outdoor faucet has an indoor shutoff valve (often in the basement, crawlspace, or utility room on the line feeding the exterior wall), close it. No dedicated shutoff? Close the main. Then open the outdoor faucet to drain the pressure and any standing water.
- Find the packing nut. It’s the hex-shaped nut directly behind the handle, where the stem enters the faucet body. This is the nut that compresses the seal around the moving stem.
- Try the easy fix first. With an adjustable wrench, snug the packing nut about a quarter to a half turn clockwise. Don’t gorilla it — over-tightening makes the handle stiff and can crush the washer. Turn the water back on and test. Roughly half of handle leaks stop right here.
- Still leaking? Take it apart. Water off again. Fully unscrew the packing nut and back the stem out by turning the handle counterclockwise as if opening the faucet all the way — the whole stem assembly should thread out.
- Replace the packing. On the stem, just under the packing nut, you’ll find either a packing washer (a beveled rubber/fiber ring), a graphite packing string, or an O-ring. Pry off the old one and slip on an exact-match replacement. If yours uses packing string, wrap a few turns of self-forming graphite packing around the stem.
- Reassemble and test. Thread the stem back in, hand-tighten the packing nut, then snug it another quarter-turn with the wrench. Turn the water on and check both the handle and the spout.
While you have the stem out, look at the seat washer on the very end (held by a small brass screw). If it’s grooved, flattened, or cracked, replace it too — it costs pennies and prevents a spout drip callback next week. If you’ve never popped a washer off a stem before, our companion walkthrough on how to remove an old tap washer without wrecking the faucet shows the exact technique so you don’t strip the screw or gouge the seat.
What parts and tools do I actually need for this repair?
You need almost nothing: an adjustable wrench, a screwdriver, and a replacement packing washer or O-ring that matches your stem. Here’s the realistic shopping and tool list.
- Adjustable wrench (or a properly sized open-end wrench for the packing nut).
- Flathead or Phillips screwdriver to remove the handle screw and the seat-washer screw.
- Assorted washer + O-ring kit (a few dollars) so you can match the size on the spot.
- Self-forming graphite packing if your faucet uses packing string instead of a washer.
- Plumber’s grease to lubricate the O-ring and stem threads for smooth handle action.
- Pipe-thread tape (PTFE) only if you end up reseating threaded connections.
Take the old part with you to the hardware store, or better yet, bring the whole stem. Outdoor faucet stems come in dozens of thread pitches and lengths, and “close enough” leaks. A brand-name match is worth the extra minute of hunting.
Which type of outdoor faucet do I have, and does it change the fix?
Yes — the repair depends on whether you have a standard compression hose bib, a frost-free hydrant, or a ball/cartridge-style valve. Here’s how they compare so you know what you’re dealing with before you start unscrewing things.
| Faucet type | How the handle seals | Typical handle-leak fix | Difficulty | Part cost |
|---|---|---|---|---|
| Compression hose bib (standard sillcock) | Packing washer or graphite string under the packing nut | Tighten packing nut; replace packing washer / repack | Easy (15 min) | $1–$5 |
| Frost-free / frost-proof hydrant | Packing nut + O-ring on a long stem that seals inside the wall | Replace packing/O-ring at handle; if body cracked from freeze, replace faucet | Easy to moderate | $3–$15 (or full unit) |
| Ball / cartridge outdoor valve | O-rings around a replaceable cartridge | Swap the O-rings or the whole cartridge | Moderate | $8–$25 |
| Quarter-turn / ceramic-disc bibcock | Sealed ceramic-disc cartridge | Replace the cartridge (no packing to adjust) | Moderate | $10–$30 |
If your outdoor tap uses a cartridge rather than old-school packing, the logic is the same one that governs indoor mixers — the cartridge is the heart of the valve. It’s worth understanding what a faucet cartridge actually does and why it matters, because on those models you don’t “repack” anything — you drop in a fresh cartridge and the leak is gone.
Why does my outdoor faucet handle leak only when the water is running?
Because the packing seal only gets stressed when the stem is turned and pressurized. When the faucet is off, the stem sits still and the water is held back downstream by the seat washer, so the handle stays dry. The moment you open it, water pressure pushes up along the moving stem, and the only thing stopping it from escaping is that packing washer or O-ring hugging the shaft. Once that seal hardens, flattens, or loses its squeeze, pressurized water finds its way up and out around the handle.
Three things wear packing out faster: hard water that deposits mineral scale on the stem and shreds the rubber, freeze-thaw cycles that expand and crack seals, and years of use that simply compress the washer past its rebound point. If you live somewhere with heavy mineral content, the same crust that ruins a stem also builds up on your indoor fixtures — the removal tricks in our guide to clearing hard-water buildup on a faucet head work on outdoor stem threads too. A quick soak in white vinegar while the stem is out can add years to the repair.
When should I just replace the whole outdoor faucet instead of fixing the handle?
Replace the entire faucet when the body is cracked, the threads inside the valve are stripped, or a frost-free hydrant has split from freeze damage — repacking a damaged body just wastes parts. Signs it’s time for a new unit:
- Water leaks from inside the wall or from the pipe body itself, not the handle — a classic sign of a burst frost-free tube.
- The handle spins freely with no resistance, meaning the stem threads or internal seat are stripped.
- You’ve replaced the packing and seat washer and it still weeps — the sealing surface (the “seat”) is pitted beyond repair.
- The faucet is old galvanized and corroding, or it’s not a frost-free model and you keep getting freeze damage every winter.
If you’re upgrading anyway, this is a smart moment to choose a modern frost-free bibcock with a proper hose connection and a vacuum breaker (an anti-siphon device most codes now require). Our roundup of the best outdoor faucets that connect cleanly to a garden hose covers which thread standards, anti-siphon features, and finishes actually hold up outdoors so your replacement lasts a decade, not a season.
How do I stop the handle leak from coming back?
Keep the packing lubricated, drain the faucet before winter, and don’t crank the handle shut. A few habits dramatically extend the life of your repair:
- Grease the stem. A dab of plumber’s grease on the O-ring and threads keeps the seal supple and the handle smooth, so you’re not torquing it hard and grinding the packing.
- Close gently. You only need enough pressure to stop the drip. Over-cranking mashes the seat washer and packing every single use.
- Winterize. Disconnect the hose in fall (a connected hose traps water and bursts the faucet in a freeze), shut off the indoor supply, and open the outdoor tap to drain it.
- Descale annually. In hard-water areas, a yearly vinegar soak of the stem prevents the scale that chews through packing.
These are the same principles that stop drips returning on any valve in the house — the logic behind fixing a persistent bathroom drip in our guide on what causes a bathtub faucet to drip and how to stop it for good maps almost one-to-one onto outdoor bibs, because it’s the same washer-and-seat mechanism at work.
FAQ
Can I fix a leaking outdoor faucet handle without turning off the water?
For a quick quarter-turn tightening of the packing nut, yes — many people snug the nut with the faucet closed and no shutoff. But the moment you unscrew the packing nut to replace the washer, you must shut off the supply, or pressurized water will spray straight out of the open valve body. When in doubt, shut it off; it takes 30 seconds and prevents a mess.
Why does my outdoor faucet handle still leak after I tightened the nut?
Tightening only works while the packing washer still has some material left to compress. If it’s hardened, cracked, or worn flat, no amount of tightening restores the seal — you’ll just make the handle stiff. At that point you need to open the faucet up and replace the packing washer or O-ring, which is a 10-minute job with a $2 part.
What’s the difference between the handle leak and the spout drip?
A handle leak (water around the stem while the faucet is running) is a packing problem. A spout drip (water from the outlet while the faucet is fully closed) is a seat-washer problem at the bottom of the stem. They’re two different washers, but you reach both in the same teardown — so it’s smart to replace both while you have the stem out.
How much does it cost to fix a leaking outdoor faucet handle?
DIY, it’s typically $2–$10 in parts (a packing washer, O-ring, or repack kit) plus tools you likely already own. If you replace the entire frost-free faucet yourself, expect $15–$40 for the unit. A plumber’s callout for the same repair usually runs $100–$250 depending on your area — which is why this is one of the highest-value DIY fixes in the house.
My faucet is a frost-free hydrant — is the handle-leak fix different?
The handle fix is nearly identical: shut off the water, remove the packing nut behind the handle, and replace the packing washer or O-ring on the long stem. The difference is that frost-free stems are much longer (often 6–14 inches) because the actual shutoff seat sits inside a heated wall. If water is coming from the wall rather than the handle, though, the internal tube likely cracked from a freeze, and that means replacing the whole hydrant.
Do I need Teflon tape or plumber’s grease for this repair?
Plumber’s grease, yes — a light coat on the O-ring and stem keeps the seal soft and the handle smooth. Teflon (PTFE) thread tape is only for sealing threaded pipe connections, not the packing itself, so you’d only need it if you’re removing the whole faucet from the supply pipe and reinstalling it.
A note on expertise and standards
Author: This guide was written by the vevetta fixtures team, drawing on hands-on repair testing across compression, frost-free, and cartridge-style outdoor faucets. We’ve torn down and rebuilt hundreds of hose bibs, and every step here reflects the sequence we use in the field, not theory.
About vevetta: vevetta (vevetta.net) designs and supplies faucets, shower systems, and bathroom fixtures built to real plumbing standards. Our valves and cartridges are pressure- and cycle-tested to meet common North American and international standards for lead-free wetted surfaces and durability, and our replacement stems and cartridges are backed by warranty coverage. When we recommend a washer, an O-ring, or a full replacement, it’s the same guidance we’d give a customer standing at our counter — buy the exact match, seal it right the first time, and it’ll outlast the next several seasons.