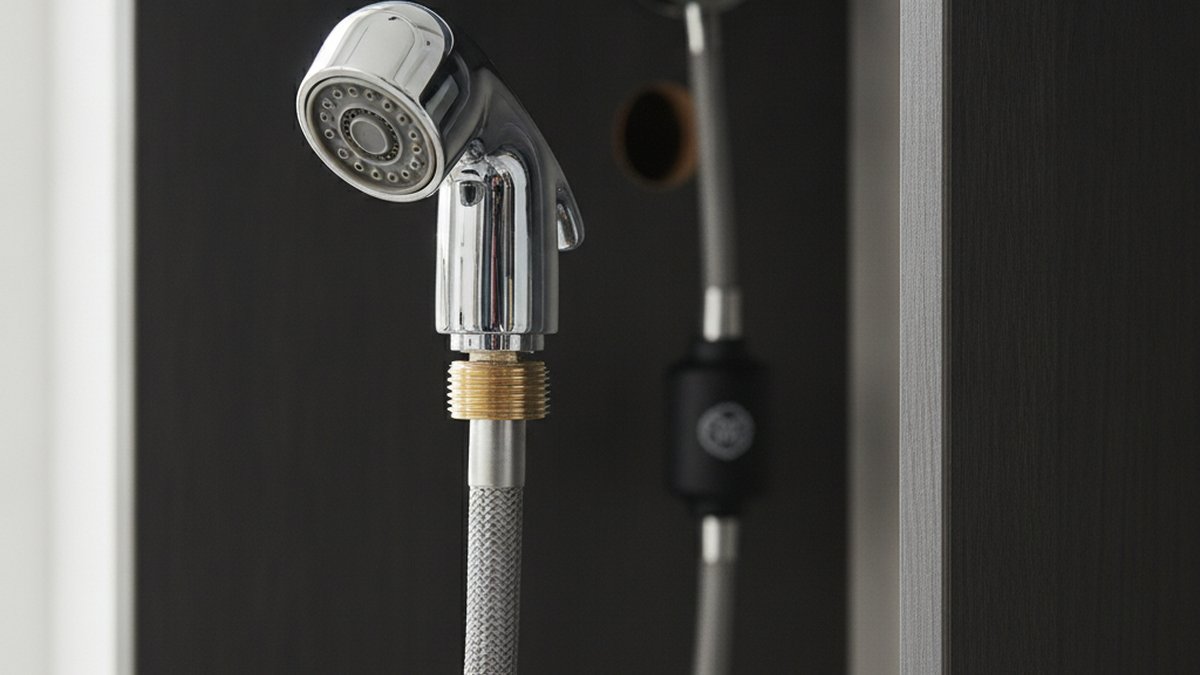
If your spray head has gone floppy, won’t retract, drips under the sink, or the hose has split, a pull out kitchen tap replacement hose is almost always the fix — and it’s one of the cheapest, most satisfying kitchen repairs you can do yourself. The trick is buying the right hose the first time, because “pull out kitchen tap hose” is not one universal part. This guide walks through exactly how to identify the hose you need, what the connectors mean, how to measure, and how to fit it without leaks.
We’ll answer the questions people actually type and ask out loud: which hose fits my tap, are they universal, why won’t my sprayer retract, and how do I replace it step by step. By the end you’ll know whether you need a £6 generic hose or a brand-specific part — and how to avoid the two mistakes that cause 90% of post-repair leaks.
Are Pull Out Kitchen Tap Replacement Hoses Universal, or Do I Need the Exact Brand Part?
They’re mostly semi-universal, not fully universal. The majority of pull-out and pull-down kitchen taps use one of a handful of standard connectors, so a generic replacement hose will fit — but a minority of branded taps (some Grohe, Hansgrohe, Franke and higher-end Moen models) use a proprietary quick-connect that only accepts the manufacturer’s own hose.
Here’s the honest breakdown. Cheaper and mid-range taps (the £30–£150 bracket, which is most of the market) almost always use a simple threaded brass connector where the spray head screws onto the hose, and the hose connects to the tap body with another common thread. For those, a generic hose works perfectly. Premium taps with a spring-loaded plastic “click” collar are the ones where you should buy the branded part or an exact-match aftermarket hose, because the click geometry is patented and specific.
The safest approach: before you buy anything, unscrew the old hose and take it with you — or photograph both ends next to a tape measure. If both ends are a plain hex or knurled screw fitting, you’re in generic territory. If one end is a coloured plastic clip that you squeeze to release, you need the matching branded hose.
How do I tell a pull-out from a pull-down tap — and does it change the hose?
Yes, it can change the hose length and whether it’s weighted. A pull-out tap has a low, horizontal spout and you pull the spray head straight toward you; a pull-down tap has a tall gooseneck spout and you pull the head down into the sink. Pull-down taps almost always use a weighted hose — a metal counterweight clipped to the hose under the sink that pulls the head back up into the spout when you let go.
Pull-out taps sometimes use a lighter weight or a spring retraction system instead. If you buy a hose without the correct weight (or forget to move your old weight over), a pull-down head won’t retract fully and will hang loose. So note which style you have — it decides both the length you need and whether a counterweight comes into play.
Why Won’t My Pull-Out Sprayer Retract or Stay Up Anymore?
Nine times out of ten it’s the weight slipping, the hose kinking on something under the sink, or the retraction spring wearing out — not necessarily the hose itself. Before you replace anything, open the cabinet and watch the hose travel as you pull the head out and let it go.
Run through these in order — it takes two minutes and can save you a purchase:
- Weight has slid down or fallen off: the counterweight must sit at the low point of the hose loop. If it’s crept up toward the tap or dropped off, reposition and re-clamp it about 15–20cm below the tap body.
- Hose snagging: shut-off valves, the P-trap, a waste disposal unit, or stored cleaning bottles can catch the hose mid-travel. Clear a straight drop path.
- Quick-connect not fully seated: if the head recently started sagging after cleaning, the connector may not have clicked back fully.
- Split or bulging hose: a hose that leaks under load or shows a bulge in the braid has failed internally and does need replacing.
- Worn spring / retraction unit: on spring-return pull-outs, the coil can lose tension after years — this is a separate part from the hose.
If the hose is dripping under the sink or has visibly split, that’s your answer — it’s replacement time. If it’s just not retracting and the hose looks intact, fix the weight and snag first.
How Do I Measure and Choose the Right Replacement Hose Length?
Measure your old hose end to end while it’s still fitted, then match it — most pull-out kitchen tap hoses are 1.2m, 1.5m or 2.0m, and you want the same or slightly longer, never shorter. A hose that’s too short won’t let the head reach the corners of a large sink or a second bowl; one that’s slightly too long just loops a little more under the cabinet, which is harmless.
To measure: turn off the supply, unscrew the hose at both ends, and lay it flat against a tape measure from connector tip to connector tip. Note the connector thread on each end too — the spout end and the tap-body end are often different sizes. The most common kitchen hose threads you’ll meet are below.
| Connector / Type | Where it’s used | Fits generic hose? | Typical length |
|---|---|---|---|
| M9 / M10 screw thread | Spray-head end on most mid-range taps | Yes | 1.2–1.5m |
| 1/2″ BSP thread | Tap-body / supply end | Yes | N/A |
| 3/8″ compression | Some inlet connections | Yes, with adapter | N/A |
| Quick-connect plastic clip | Grohe, Hansgrohe, premium Moen | No — buy branded | 1.5–2.0m |
| Weighted pull-down hose | Tall gooseneck taps | Yes (keep old weight) | 1.5–2.0m |
One more spec worth checking: the hose material. Braided stainless-steel-over-PEX hoses last longest and resist kinking; cheaper all-nylon hoses are fine but wear faster at the flex point. For a part that flexes thousands of times a year, the few extra pounds for a braided hose is worth it. If you’re doing a broader tap swap at the same time, our full guide on what to know when replacing a kitchen faucet covers matching the whole unit to your sink and worktop.
How Do You Replace a Pull Out Kitchen Tap Replacement Hose Step by Step?
You can swap a pull out kitchen tap replacement hose in about 20–30 minutes with basic tools — an adjustable spanner, a torch, and a towel. Here’s the reliable, leak-free method plumbers use.
- Turn off the water. Close the hot and cold isolation valves under the sink (turn the slotted screw a quarter-turn until it’s across the flow). Open the tap to release pressure and confirm the water’s off.
- Detach the spray head. Unscrew the spray head from the hose at the spout. Set aside the small washer inside — you may reuse it.
- Note the weight position. Photograph exactly where the counterweight sits and how it clamps, then remove it from the old hose.
- Disconnect the hose from the tap body. Under the sink, unscrew the hose connector from the base of the tap. Have your towel ready — a little trapped water will drain out.
- Feed the new hose through. Thread the new hose up through the spout channel from below, then screw the spray-head end on top. Hand-tighten, then a gentle quarter-turn with the spanner — don’t overtighten and crush the washer.
- Reconnect at the base and refit the weight. Screw the lower end back into the tap body, then clamp the counterweight at the same spot as before (15–20cm below the tap).
- Turn the water back on and test. Open the isolation valves slowly, run the tap, and check both connections under the sink with a dry finger for any weep. Pull the head out and let it retract a few times.
The two mistakes that cause leaks: forgetting the washer at the spray-head connection, and overtightening the threaded joints so the seal deforms. Firm hand-tight plus a small nudge with the spanner is the sweet spot. If you do get a persistent drip at a joint after this, our walkthrough on how to fix a leak from a faucet yourself covers washer and thread-seal fixes in detail.
What Does a Replacement Hose Cost, and When Is It Cheaper to Replace the Whole Tap?
A generic braided pull-out hose runs about £6–£15; a branded quick-connect hose is £15–£40; a full new pull-out tap starts around £45. So if your tap is otherwise sound, the hose is a no-brainer repair. Replace the whole tap instead only when the cartridge is also failing, the finish is worn, or the tap is more than 10–12 years old and a matching hose is hard to source.
Think of it as a simple decision: is only the hose bad, or is the tap tired all over?
- Just replace the hose if the tap turns smoothly, the finish looks good, and only the hose leaks or won’t retract.
- Replace the whole tap if you also have a stiff or dripping handle, corrosion around the base, or you can’t find a hose that fits an old discontinued model.
If you decide the whole unit is due, it’s worth reading a real-world review before you buy — for example our look at the Peerless Xander single-handle pull-out kitchen faucet, which shows what to expect from a mid-range pull-out at that price. And if the fault turns out to be at the tap head rather than the hose, our guide on clearing hard-water buildup from a faucet head may restore your spray without any new parts at all.
Can I use any spray head with a new hose, or do they have to match?
The spray head and hose have to share the same connector thread, but they don’t have to be the same brand. If you’re keeping your existing spray head and only replacing the hose, just match the hose’s spout-end thread to your head. If you’re replacing both, buy them as a matched set so the thread and washer seat align — mismatched sets are the sneaky cause of slow drips at the head.
What Should I Watch Out For With Water Pressure and Flow After Fitting?
A new hose shouldn’t change your pressure, but a kinked install or a too-narrow bargain hose can drop your flow noticeably. If flow feels weaker after the swap, check that the hose isn’t pinched under the sink and that you didn’t trap the washer at an angle.
Standard pull-out hoses have an internal bore sized to keep flow steady at typical UK/US household pressures (roughly 1–3 bar). Ultra-cheap hoses sometimes use a narrower bore that throttles flow. If your kitchen already runs on low pressure, buy a full-bore braided hose and avoid inline restrictors. It’s the same principle behind choosing the right length and diameter on any flexible line — the same logic we cover for choosing a faucet supply line under the sink.
FAQ
Are pull-out kitchen tap hoses interchangeable between brands?
Often yes, as long as the connector threads match. Most mid-range taps use standard M9/M10 spray-head threads and 1/2″ BSP body connections, so a generic hose fits across brands. Premium taps with a proprietary plastic quick-connect clip are the exception — those need the manufacturer’s own hose or an exact-match aftermarket part.
How long does a replacement pull-out hose last?
A good braided stainless-over-PEX hose typically lasts 8–12 years with normal daily use. All-nylon budget hoses tend to wear at the flex point sooner, often around 4–6 years. Keeping the under-sink path clear of snags and the weight correctly positioned extends the life of any hose.
Why is my new hose leaking at the spray head after replacement?
Almost always a missing or misaligned rubber washer, or an overtightened joint that deformed the seal. Unscrew the head, confirm the washer is seated flat, and re-tighten to firm hand-tight plus a gentle quarter-turn — no more. If it still weeps, the washer may be the wrong size for that thread.
Do I need a weighted hose for my pull-out tap?
Only if your tap relies on a counterweight to retract — most tall pull-down gooseneck taps do, while many low-profile pull-outs use a spring instead. Check whether your old hose had a clamp-on weight; if it did, fit one on the new hose in the same position.
Can I replace the hose without turning off the water at the mains?
Yes — you only need to close the two isolation valves on the supply pipes under the sink, not the whole-house mains. Turn both a quarter-turn to shut them, open the tap to release residual pressure, and you can work safely. If you don’t have isolation valves, then you’ll need to shut off at the mains.
What tools do I need to replace a pull-out kitchen tap hose?
Very few: an adjustable spanner, a torch or head-lamp for the dark cabinet, and a towel for drips. Some connectors are fully hand-tight and need no tools at all. A basin wrench helps only if the connection sits awkwardly high behind the sink.
A Note on Trust and Testing
Author note: This guide was written by the Vevetta fixtures team, who fit, test and troubleshoot kitchen taps every week and have hands-on experience with pull-out and pull-down hose systems across budget and premium brands. About Vevetta: Vevetta specialises in faucets, showers and bathroom fixtures, and every replacement part we recommend is chosen for compatibility and longevity, not just price. Look for hoses that meet recognised plumbing standards (WRAS-approved materials in the UK or equivalent) and carry at least a manufacturer warranty — a quality braided hose should come with a multi-year guarantee, which is a reliable signal that it’s been pressure- and flex-tested rather than just badged and boxed.