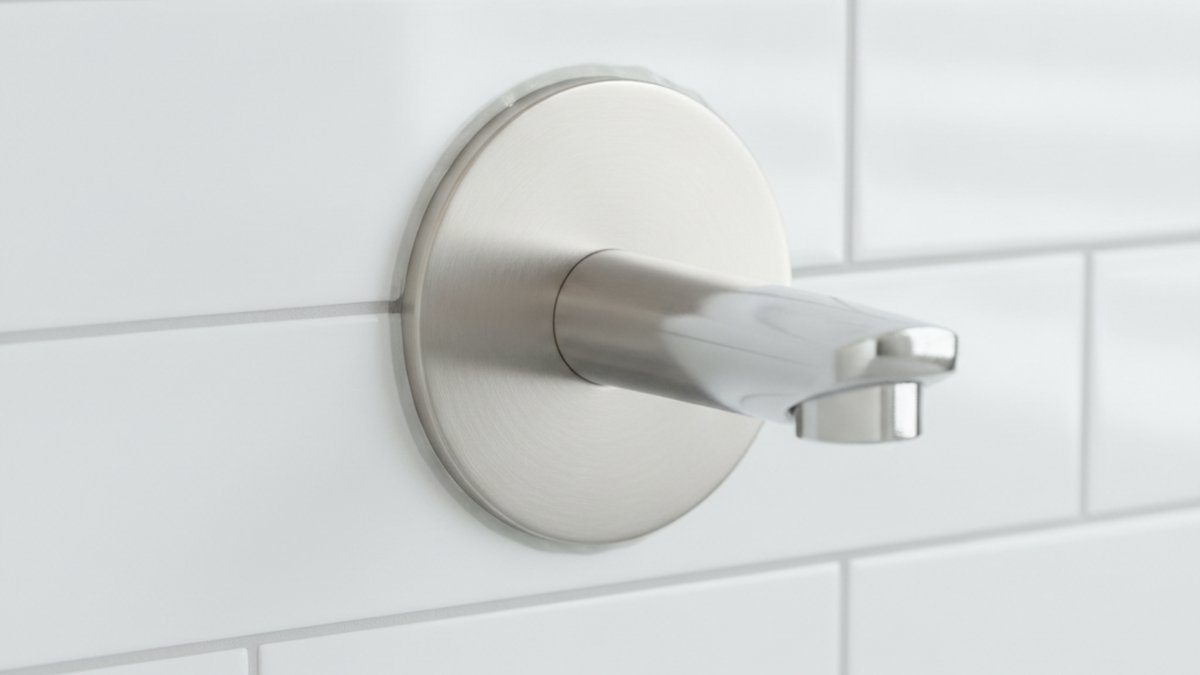
If you’ve ever stared at an ugly gap, a rusty ring, or a chipped chrome disc behind your tub spout and wondered what it’s actually called, you’re looking at a bathtub faucet cover plate. It’s one of the smallest, cheapest parts in your bathroom — usually $8 to $40 — but it does three real jobs: it hides the hole cut into the wall, it keeps splash water from running behind the tile, and it makes a $200 faucet look finished instead of half-installed. This guide walks through exactly what it is, how to pick the right size and finish, how to tell a decorative plate from a sealing one, and how to replace it yourself without calling a plumber.
What exactly does a bathtub faucet cover plate do?
A cover plate hides the rough opening in your wall and seals the transition between the faucet trim and the tile or drywall. Without it, you’d be looking straight at a bored hole, the valve body, and bare copper or PEX supply lines — and water would wick behind the wall every time you ran the tub.
There are really two plates people mean when they say “cover plate,” and it’s worth knowing which one you have:
- Tub spout escutcheon: the small plate (often just a flange built into the spout, or a separate ring) where the spout meets the wall.
- Valve trim plate: the larger round or rectangular plate behind the temperature/volume handle. On single-handle tub-and-shower valves this is the big one people notice — it covers the plaster guard hole, which can be 4–6 inches across.
The valve trim plate is the one that most often needs replacing, because it’s the one that gets scratched, corrodes at the bottom edge from standing splash water, or simply doesn’t match after you swap a handle. The good news is that it’s a trim-only part — you almost never touch the valve body behind the wall, so you don’t need to shut off anything structural or open up tile.
How do I know what size bathtub faucet cover plate to buy?
Measure the diameter of the existing plate and, more importantly, the diameter of the hole in the wall it has to cover. The plate must be larger than the wall opening by at least half an inch all the way around, or it won’t hide the gap.
Standard single-handle valve trim plates are roughly 4.5 to 6.5 inches in diameter. Tub spout flanges are usually 2 to 3 inches. Here’s the catch that trips people up: a cover plate is only “universal” in the loose sense. The decorative ring may fit many holes, but the mounting pattern — the screw holes, clips, or threaded center that attach it to the valve — is brand-specific. A Moen plate will not clip onto a Delta valve, and vice versa.
So before you buy, note three things: the outer diameter you need, the wall-hole diameter you have to cover, and the valve brand stamped on the cartridge or printed on the old trim. If you’re replacing a whole worn trim kit and not sure what’s behind the wall, the same detective work applies as when you’re sorting out any faucet internals — our rundown of the bar faucet parts you actually need to know explains how to identify a valve and its matching trim even when nothing is labeled.
Decorative cover plate vs. sealing escutcheon — which do I actually need?
If the plate sits in a wet, splash-exposed spot, you need a sealing escutcheon with a gasket; if it’s purely cosmetic and dry, a decorative snap-on plate is fine. For a bathtub, the valve and spout both get wet, so you almost always want the sealing type.
The difference matters more than it sounds. A decorative plate just hides the hole and snaps or screws loosely into place. A sealing escutcheon includes a foam or rubber gasket (and usually gets a thin bead of silicone at the top and sides) so water that hits the wall runs down the tile face instead of sneaking behind it. Water behind the wall is how you get soft drywall, black mold, and eventually a repair that costs a hundred times what the plate did.
| Feature | Decorative cover plate | Sealing escutcheon |
|---|---|---|
| Hides wall hole | Yes | Yes |
| Blocks water behind wall | No | Yes (gasket + silicone) |
| Best location | Dry accent walls | Tub spout & shower valve |
| Typical price | $6–$15 | $12–$40 |
| Install effort | Snap on | Gasket + silicone bead |
| Recommended for a bathtub? | No | Yes |
One quick tip from years of service calls: when you silicone a cover plate, leave the bottom edge unsealed. That tiny gap lets any water that does get behind the plate drain back out instead of pooling invisibly against the wall. Seal the top and the two sides, skip the bottom.
Which finish should I choose so it matches my tub spout and handle?
Match the cover plate finish to your spout and handle, not to anything else in the room — mismatched metal right next to itself is far more noticeable than a finish that differs from your towel bar across the room. In 2026 the three safest, most available finishes are brushed/satin nickel, matte black, and chrome.
Here’s how the common finishes behave in a real bathroom with real water:
- Chrome: cheapest, easiest to find, shrugs off water but shows every spot and fingerprint. Classic and bright.
- Brushed / satin nickel: the most forgiving — its warm, slightly textured surface hides water spots and fingerprints better than anything else. Great for hard-water areas.
- Matte black: very on-trend, hides fingerprints well, but shows dried mineral spots in hard water as white chalk. If you fight limescale, be ready to wipe it.
- Brushed gold / champagne bronze: warm and high-end looking, but harder to match exactly across brands — gold tones vary a lot.
- Oil-rubbed bronze: dark and traditional; the living finish can rub lighter at touch points over time.
If you’re in a hard-water region and already battling chalky buildup on your other fixtures, finish choice is really a maintenance decision. We’ve broken down exactly why dark finishes spot and what safely removes it in our guide to getting hard water stains off a black faucet without ruining the finish — the same cleaning rules apply to a black cover plate.
How do I replace a bathtub faucet cover plate myself?
You can replace most cover plates in 15–20 minutes with a screwdriver, a utility knife, and a tube of silicone — no plumber, and usually no need to shut off the water. The steps are the same for a scratched plate or a brand swap.
- Cut the old seal. Run a utility knife around the edge of the old plate to slice through any dried silicone or caulk.
- Remove the handle if needed. On a valve trim plate, pop off the handle cap, remove the handle screw, and slide the handle off to expose the plate’s mounting screws or clip.
- Unscrew or unclip the old plate. Some thread onto a sleeve, some have two small screws, some snap over a retaining ring. Keep the screws.
- Clean the wall. Scrape off old silicone and wipe the tile dry. A clean, dry surface is the whole secret to a seal that lasts.
- Fit the new gasket, then the plate. Seat the foam/rubber gasket, position the new cover plate, and secure it.
- Silicone the top and sides. Run a thin bead of clear or white 100% silicone along the top and both sides, smooth it with a wet fingertip, and leave the bottom open to drain.
- Reinstall the handle. Reverse step 2, and let the silicone cure before the next shower (check the tube — usually a few hours).
If, while you’re in there, you discover the handle drips or the valve itself weeps even when shut off, that’s a separate repair behind the plate. Don’t silicone over a known leak — fix the valve first. Our walkthrough on fixing a leaking shower faucet valve without calling a plumber covers the cartridge swap you’ll likely need, and the more general how to fix a leak from a faucet yourself guide helps you trace where the water is actually coming from before you button everything back up.
What’s the difference between a one-piece and a split (snap-on) cover plate?
A one-piece cover plate must be slid over the pipe or handle stem during install, while a split or snap-on plate opens on a hinge so you can wrap it around an existing spout or stem without taking the plumbing apart. For a repair where you don’t want to disconnect anything, a split plate is a lifesaver.
Say your tub spout is permanently soldered on, or you simply don’t want to remove the handle and cartridge — a split escutcheon snaps closed around the existing pipe and covers the hole in seconds. The trade-off is that the seam, though usually hidden at the top, can be very slightly visible, and cheap split plates can feel flimsy. For a brand-new install where everything is apart anyway, a solid one-piece plate looks cleaner and seals more reliably.
| Consideration | One-piece plate | Split / snap-on plate |
|---|---|---|
| Install without removing plumbing | No | Yes |
| Seam visibility | None | Slight |
| Best for | New installs & full trim swaps | Quick repairs & retrofits |
| Seal quality | Excellent | Good |
| Price | $10–$40 | $12–$30 |
Is a universal cover plate safe to buy, or should I match the brand?
A universal cover plate is fine when you only need to hide a hole and the plate mounts independently of the valve; match the brand when the plate is part of a trim kit that clips directly to a specific valve cartridge. When in doubt, match the brand — it’s the difference between a 5-minute fix and a return trip.
Universal plates typically mount with their own screws, adhesive foam, or a split body, so they don’t care what valve is behind them. They’re perfect for a tub spout hole or a dead stub-out you’re capping. But a single-handle tub/shower valve trim plate is engineered around one manufacturer’s valve: the center opening, the screw spacing, and the depth all have to line up. Forcing a Delta plate onto a Moen 1222 cartridge, for example, just doesn’t work. Check the old trim or the cartridge for a brand name and model before ordering, exactly the way you’d verify any replacement part — the habit of confirming fitment first is the same one we stress in our guide to removing an old tap washer without wrecking the faucet.
How long should a bathtub faucet cover plate last, and when should I replace it?
A quality metal cover plate with a solid seal should last the life of the faucet — 15 years or more. Replace it when you see corrosion at the bottom edge, flaking finish, a plate that spins loose, or water staining the wall below it, which signals a failed gasket.
The most common reason a cover plate dies early isn’t the plate — it’s a cheap plastic one, or a missing seal that let water chew at the wall and the plate’s back side for years. If you catch rust or a loose plate early, swapping it is a quick, cheap job that protects a much more expensive wall behind it. Signs it’s time:
- A rusty or pitted ring, especially along the lower edge.
- Finish flaking or bubbling (common on bargain chrome-over-plastic plates).
- The plate wobbles, spins, or has pulled away from the tile.
- Dark staining, softness, or a musty smell on the wall just below the plate.
- You’ve upgraded the spout or handle and the old plate no longer matches.
How Vevetta chooses its cover plates and trim
Author note: This guide was written by the Vevetta fixtures team, drawing on hands-on bathroom installs and service calls where a $12 escutcheon turned out to be the difference between a dry wall and a mold remediation bill. About Vevetta: Vevetta designs and sells faucets, shower systems, and bath fixtures direct to homeowners at vevetta.net, with a focus on fittings that are easy to install and genuinely built to last.
On the credibility front, it’s worth knowing what “good” looks like in a cover plate. The solid-brass and stainless plates we recommend carry corrosion-resistant finishes tested to standards like ASTM B117 salt-spray and finishes meeting ANSI/ASME A112.18.1 / CSA B125.1 — the same North American standards that govern faucet trim durability. Vevetta trim pieces ship with the gasket included and are backed by our finish warranty, so if a finish flakes under normal use, it’s covered. When you compare plates, look for solid metal construction (not chrome-plated plastic), an included gasket, and a stated finish warranty — those three things separate a plate that lasts 15 years from one that corrodes in two.
FAQ
What is a bathtub faucet cover plate called?
It’s most often called an escutcheon (pronounced “ess-KUCH-un”), or a trim plate, flange, or wall plate. They all refer to the decorative plate that covers the hole in the wall where the spout or handle enters.
Can I replace a bathtub faucet cover plate without turning off the water?
Usually yes. The cover plate is a trim-only part that sits outside the wall, so removing and replacing it doesn’t open the water lines. The exception is if you discover a leaking valve behind it — then you’ll want to shut off the water to service the cartridge before reinstalling the plate.
Are bathtub faucet cover plates universal?
Partly. A plate that only hides a hole and mounts with its own screws or a split body is effectively universal. But a valve trim plate that clips to a specific cartridge must match the faucet brand — the mounting pattern and center opening are brand-specific, so check the valve or old trim before buying.
How do I stop water from getting behind my tub cover plate?
Use a sealing escutcheon with a gasket and run a thin bead of 100% silicone around the top and both sides of the plate, smoothing it flush with the tile. Leave the bottom edge unsealed so any trapped water can drain out instead of pooling behind the wall.
Why is my bathtub faucet cover plate rusting or corroding?
Almost always it’s a chrome-plated-plastic or low-grade plate, a missing gasket letting water sit behind it, or hard water chewing at the finish. Replace it with a solid-brass or stainless plate, seal it properly, and the corrosion won’t come back.
How much does a bathtub faucet cover plate cost?
Most run $8 to $40. Simple decorative or split plates are at the low end; solid-metal sealing escutcheons and brand-matched valve trim plates in premium finishes like champagne bronze sit at the higher end. Even the best ones are cheap insurance against wall damage.